
You’ve decided to tackle Adho Mukha Svanasana, the revered Downward-Facing Dog. It’s a pose that shows up in countless yoga classes, a foundational shape that offers a wealth of benefits when approached with understanding and care. You might look at experienced practitioners and feel a pang of intimidation, seeing their seemingly effortless inversions. Yet, mastering this pose is well within your reach. It’s not about achieving an immediate perfect form, but about consistent practice, mindful adjustments, and a deep connection to your body’s capabilities. You will learn to move from a feeling of strain and uncertainty to one of grounded strength and expansive calm. The process itself becomes a teacher, guiding you toward a deeper awareness of your physical being.
Before you even think about lifting your hips, you need to establish a solid foundation. Imagine your yoga mat as your canvas, and your body as the paint. You want to apply the foundational colors correctly for the masterpiece to emerge.
Finding Your Starting Position
You begin on your hands and knees, a position often referred to as tabletop pose. Your objective here is to create a balanced starting point, avoiding any imbalances that could carry through the pose.
Wrists Under Shoulders, Knees Under Hips
Position yourself so that your wrists are directly beneath your shoulders. Think of drawing an imaginary vertical line from the center of your shoulder joint straight down to your wrist. Simultaneously, ensure your knees are positioned directly under your hips. This creates a stable tabletop structure, distributing your weight evenly. You are creating a strong base, much like a builder carefully lays the foundation for a house.
Spreading Your Fingers
This is a small detail, but it carries immense importance. Spread your fingers wide, as if you are trying to capture as much of the mat as possible with your hands. Then, press firmly through your entire palm, from the base of your fingers to the heel of your hand. Imagine you are trying to create suction with your palms. This distributes the pressure, keeping your wrists healthy and providing a stable anchor for your upper body. You’re not just placing your hands; you’re actively engaging them as a primary support.
The Ascent: Moving into the Pose
Once your foundation is set, you are ready to transition into the iconic inverted V shape. This is where the breath becomes your most valuable tool.
Lifting with the Exhale
The exhale is your cue to deepen the pose. As you breathe out, you will initiate the movement that brings your hips skyward.
Tucking Your Toes
Before you lift, perform a small but important action: tuck your toes under. This creates a slight leverage, preparing your feet to press into the mat and aid in the hip lift. It’s like coiling a spring, gathering energy for the release.
Sending Hips Up and Back
With a deliberate exhale, begin to send your hips up and back. Feel the energy moving from your feet, traveling up your legs, and culminating in the upward and backward motion of your pelvis. Your body will naturally start to form an inverted letter ‘V’. Don’t force this; let the breath guide the movement. You are creating extension, not just a shape.
Cultivating Length: Your Spine’s Elongation
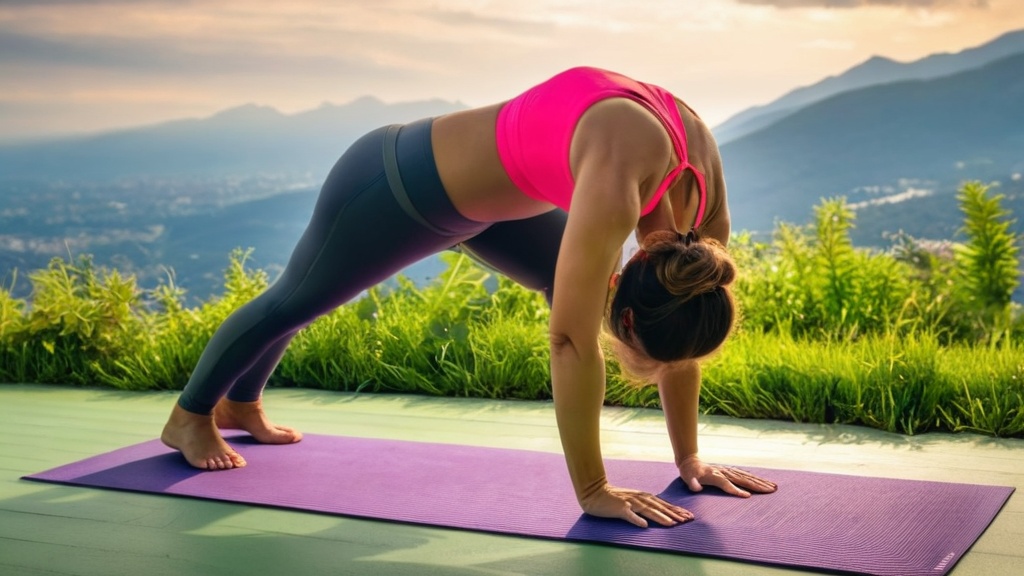
The hallmark of a well-executed Downward-Facing Dog is a long, straight spine. This is not about forcing your heels to the floor; it’s about creating space and length throughout your entire back.
Aiming for a Straight, Elongated Back
Your primary focus here is to keep your spine in a neutral, elongated position. Imagine a string attached to your tailbone, gently pulling it up and back. This helps to create space between each vertebra. It’s akin to stretching a rubber band – you want maximum extension without snapping.
Relaxing the Head and Neck
Allow your head and neck to hang freely between your arms. There should be no tension here. Let gravity do its work, lengthening the back of your neck and releasing any holding. You’re not craning your neck to look forward; you’re letting it be a natural extension of your spine. Think of your head as a relaxed pendulum.
Activating Your Core: The Powerhouse
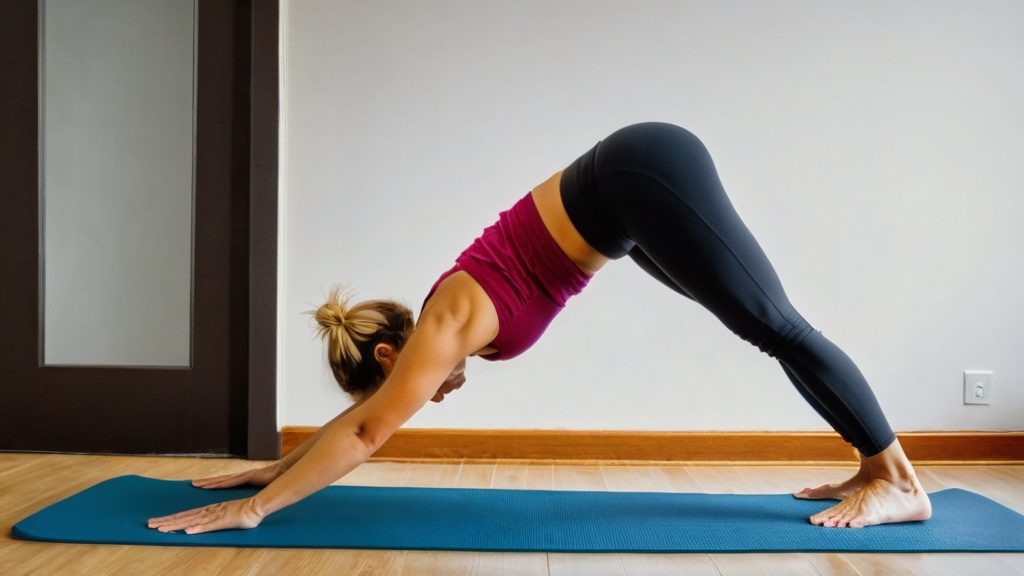
Your core muscles are your body’s central support system. In Downward Dog, engaging them is key to stability, protecting your lower back, and creating that sense of lifted strength.
Drawing the Belly In and Keeping the Core Active
As you hold the pose, consciously draw your lower belly in towards your spine. This doesn’t mean sucking your stomach in tightly, but rather engaging your deep abdominal muscles. This engagement creates a natural brace, supporting your spine and preventing it from sinking or rounding. Feel a sense of subtle abdominal tightness, ready to support any movement. Your core is your anchor.
Pressing the Shoulders Away from the Ears
This is a vital cue for shoulder health and upper body stability. Actively press your shoulder blades down your back, drawing them away from your ears. This creates space in your shoulders and prevents them from bunching up. Imagine you are trying to broaden across your upper back. You’re not collapsing into your shoulders; you’re finding an active lift and expansion.
Finding Comfort and Stability: Modifications and Refinements
| Step | Description |
|---|---|
| 1 | Start on your hands and knees, with your wrists aligned under your shoulders and your knees under your hips. |
| 2 | Tuck your toes under and lift your hips up and back, straightening your legs and arms to form an inverted V shape. |
| 3 | Press your hands firmly into the mat and distribute the weight evenly between your hands and feet. |
| 4 | Engage your core and lengthen your spine, reaching your tailbone toward the ceiling. |
| 5 | Relax your head and neck, allowing them to hang freely between your arms. |
| 6 | Hold the pose for 5-10 breaths, then release by bending your knees and returning to the starting position. |
You are not expected to achieve the perfect pose on your first attempt, or even your hundredth. Your body is unique, and that’s a wonderful thing. Learning to modify and refine is part of the mastery process.
The Bend in Your Knees
Flexibility varies from person to person. If you feel a significant rounding in your spine, or a pulling sensation in your hamstrings, do not hesitate to keep a soft bend in your knees. This is not a sign of weakness; it is a smart adaptation that allows you to prioritize spinal length. You are still working the muscles and creating extension, just with a slightly different presentation. A bent knee allows your hips to lift higher and your spine to lengthen more readily.
Using Props for Support
Props are your allies, not crutches. If you find your wrists are bothering you, blocks under your hands can help bring the floor closer to you, reducing the angle at your wrists. A blanket can be placed under your knees for cushioning if they feel sensitive.
The Wall or Chair for Assistance
A wall can be a wonderful tool for building confidence and understanding the sensation of the pose. Stand facing a wall, place your hands on it at shoulder height, and walk your feet back, sending your hips up and back. This offers a similar shape but with less strain on the wrists and shoulders. Similarly, you can place your hands on the seat of a chair and step your feet back. These tools allow you to experience the lengthening and opening without the full weight-bearing demands. You are still experiencing the benefits of the pose, just with external support.
Breathing and Refining Your Pose
The breath is your constant companion in yoga. It’s your guide for deepening, releasing, and finding stability.
Holding for a Few Breaths
Once you’ve found your version of the pose, settle in. Take several conscious breaths. Feel the air filling your lungs and the subtle expansion of your rib cage. With each exhale, observe if you can find a little more length or ease.
Pedaling Your Feet
This is a classic refinement for Downward Dog. If your hamstrings feel tight, consciously bend one knee deeply while pressing the opposite heel towards the mat. Then, switch sides. Alternately bending and straightening the knees helps to gently stretch the calf muscles and hamstrings. It’s a dynamic way to open up the back of your legs.
Adjusting Weight Between Hands and Feet
Pay attention to where you feel the most pressure. You want to distribute your weight relatively evenly between your hands and feet. If you feel too much pressure in your wrists, draw more energy up your arms and into your shoulders. If your feet feel heavy and ungrounded, press them more firmly into the mat. Your goal is to find a balanced distribution that feels both strong and stable. You are seeking equilibrium, a point where you feel securely anchored yet liberated.
By approaching Downward-Facing Dog with this level of detail and self-awareness, you transform a challenging posture into an opportunity for growth. You learn to listen to your body, to make intelligent adjustments, and to appreciate the strength and flexibility that unfolds with consistent practice. You are not just doing a pose; you are experiencing your body in a profound and revealing way. You’re building a physical vocabulary, one breath and one posture at a time. Your journey toward mastery is marked not by perfection, but by persistent, mindful effort. You are the sculptor of your own form, and Downward Dog is one of your most versatile tools.
FAQs
What is the Downward Dog Pose?
The Downward Dog Pose is a yoga pose that involves the body forming an inverted V shape with the hands and feet on the ground and the hips lifted towards the ceiling.
What are the benefits of doing the Downward Dog Pose?
The Downward Dog Pose helps to stretch and strengthen the entire body, including the arms, shoulders, back, and legs. It also helps to improve posture, relieve stress, and increase circulation.
How do you do the Downward Dog Pose correctly?
To do the Downward Dog Pose correctly, start on your hands and knees, then lift your hips towards the ceiling while straightening your arms and legs. Press your hands and feet into the ground and lengthen your spine. Hold the pose for several breaths.
What are some common mistakes to avoid when doing the Downward Dog Pose?
Common mistakes to avoid when doing the Downward Dog Pose include rounding the back, letting the shoulders hunch up towards the ears, and letting the heels lift off the ground. It’s important to focus on lengthening the spine and keeping the body in a straight line.
Are there any modifications for the Downward Dog Pose?
Yes, there are modifications for the Downward Dog Pose, such as using a yoga block under the hands to reduce wrist strain, or bending the knees slightly if there is tightness in the hamstrings. It’s important to listen to your body and make adjustments as needed.