You want to begin a yoga practice. You seek a way to move your body, calm your mind, and find relief from daily stresses. Floor yoga, with its grounding postures and accessible nature, provides an ideal starting point. It offers a gentle introduction to movement and mindfulness, allowing you to connect with your body in a supportive environment. Every position invites you to explore your limits with kindness and awareness.
Why Floor Yoga Works for You
When you first approach yoga, the idea of standing balances or intricate inversions might seem intimidating. Floor yoga removes that apprehension. It anchors you to the earth, offering stability and allowing you to focus on fundamental movements and breathwork. From this grounded position, you can build strength, flexibility, and body awareness at your own pace. You learn to listen to your body’s wisdom, honoring its needs and capabilities.
A foundational element of floor yoga involves moving with your breath. You synchronize your inhalations and exhalations with each transition and hold. Breathing deeply helps to calm your nervous system, reduce tension, and bring clarity to your mind. Concentration on breath also helps you stay present, fostering a deeper connection to your practice.
Getting Started: Your First Floor Poses
You begin your practice with postures designed to center and settle your being. Starting on the floor allows you to immediately feel supported and secure. You can choose from several excellent opening positions.
Child’s Pose (Balasana)
You kneel on your mat, bringing your big toes to touch and spreading your knees wide or keeping them hip-width apart. As you exhale, you lower your torso between your thighs, extending your arms forward or resting them alongside your body. Your forehead rests gently on the mat. You feel a gentle stretch in your lower back and hips. This pose provides comfort and a sense of retreat. You breathe deeply into your back, expanding your rib cage with each inhalation.
Savasana (Corpse Pose)
You lie flat on your back, letting your arms rest beside your body, palms facing up. Your legs extend, feet falling naturally open. You close your eyes gently. You allow your body to completely relax into the floor. This pose, often used at the end of a practice, also serves as an excellent starting point for cultivating stillness and awareness. You notice the rise and fall of your breath, allowing all tension to dissipate.
Crocodile Pose (Makarasana)
You lie on your stomach, placing your forehead on your stacked hands or forearms. Your legs can be together or slightly apart, whichever feels more comfortable for your lower back. This posture offers a restorative opening, gently releasing tension from your spine and shoulders. You breathe into your belly, feeling its movement against the floor.
Comfortable Seated Position
You sit cross-legged or with your legs extended in front of you. You can sit directly on the floor or on a cushion or bolster for added comfort and spinal alignment. You lengthen your spine, bringing your shoulders back and down. Your hands rest gently on your knees, palms up or down. You close your eyes or soften your gaze. From here, you bring your attention inward, noticing your breath and the sensations in your body.
A Gentle Floor Flow for Mobility
Once you have centered yourself, you move into a sequence that gently mobilizes your spine and limbs. These movements are straightforward, focusing on fluidity and breath.
Cat-Cow Flow (Marjaryasana-Bitilasana)
You come onto your hands and knees, aligning your wrists under your shoulders and your knees under your hips. Your spine is neutral. As you inhale, you drop your belly, arch your back, and lift your gaze (Cow Pose). As you exhale, you round your spine, tucking your chin to your chest and drawing your navel towards your spine (Cat Pose). You flow between these two positions, synchronizing each movement with your breath. This warms up your spine and increases flexibility.
Supine Twist (Supta Matsyendrasana)
You lie on your back, hugging your knees to your chest. You extend your left arm out to the side, palm up. As you exhale, you let your knees fall to the right, keeping your left shoulder grounded. You can turn your head to the left, if comfortable. You breathe into your side body, feeling a gentle release in your spine. After several breaths, you return your knees to center and repeat on the other side. This twist helps detoxify and realign your spine.
Knee-to-Chest Variation (Apanasana)
You lie on your back, drawing one knee at a time towards your chest. You can interlace your fingers over your shin or behind your thigh. You gently hug the knee in, feeling a stretch in your hip and lower back. You hold for several breaths, then switch legs. You can also draw both knees to your chest, perhaps rocking gently side to side to massage your lower back. This pose releases tension in your hips and lower back.
Building Strength on the Floor
You might assume floor yoga is solely for relaxation, but you can build remarkable strength from a grounded position. The following sequence introduces core engagement and back strengthening without requiring complex balancing acts.
Plank Pose (Phalakasana)
You start on your hands and knees. You extend your legs back, coming onto the balls of your feet. You push the floor away, creating a straight line from your head to your heels. Your core engages, pulling your navel towards your spine. You avoid letting your hips sag or lift too high. You hold this pose for a few breaths, building foundational core strength.
Lower to Belly
From Plank, you gently lower your knees to the mat. Then, with control, you lower your chest and chin to the floor, keeping your elbows close to your body. You land softly, maintaining awareness of your body.
Locust Pose (Salabhasana)
You lie on your stomach, forehead resting on the mat. Your arms are alongside your body, palms facing down, or interlaced behind your back. As you inhale, you lift your head, chest, and legs off the mat. You keep your gaze downward to maintain a long neck. You feel your back muscles working. You hold for a few breaths, then gently lower back down. This pose strengthens your back and glutes.
Downward-Facing Dog (Adho Mukha Svanasana)
From Locust, you press your hands into the mat beside your chest and tuck your toes. You push up to your hands and knees, then lift your hips towards the sky, straightening your arms and legs. You can keep a slight bend in your knees, especially if your hamstrings feel tight. Your head hangs freely between your arms. You find a long, straight line from your wrists to your hips. You pedal your feet, bending one knee then the other, to stretch your calves. This pose elongates your spine and strengthens your entire body.
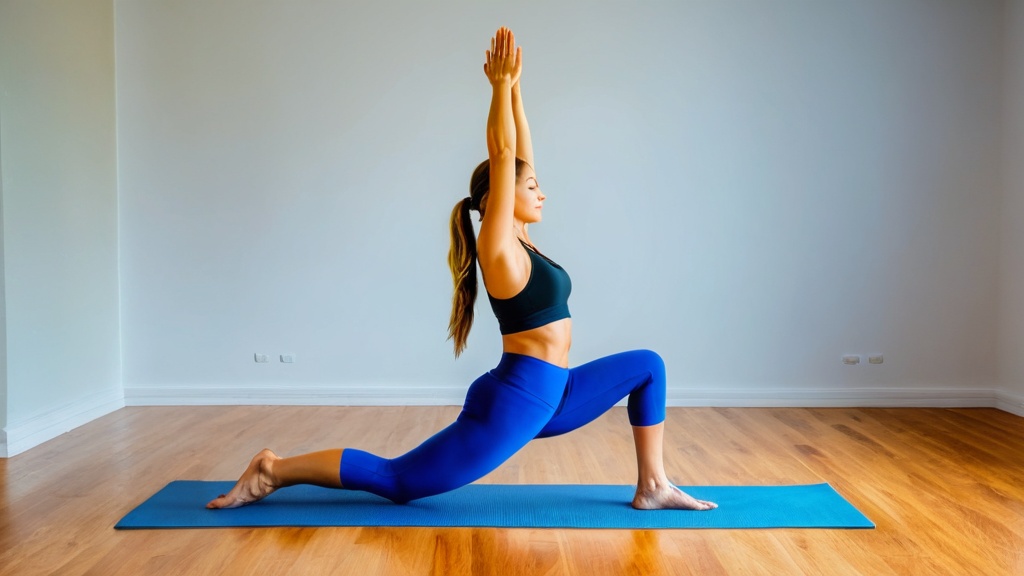
Three-Legged Dog Variation
From Downward Dog, you inhale and lift one leg towards the sky. You keep your hips level, or gently open them for a small hip stretch. You keep your standing leg strong. You exhale and gently lower your leg. You repeat on the other side. This adds a layer of strength and balance to your Downward Dog. Note that while this is a standing pose, it flows directly from floor-based strength building.
Seated Options for Deeper Awareness
Seated floor poses provide opportunities for longer holds and sustained focus on your breath and body. They are particularly accessible and offer deep stretches.
Butterfly Fold (Baddha Konasana)
You sit on the mat, bringing the soles of your feet together and letting your knees fall open to the sides. You can sit on a blanket or cushion for comfort. You can keep your feet closer to your groin for a deeper hip opener or further away for a gentler stretch. You lengthen your spine. As you exhale, you gently fold forward from your hips, keeping your back straight. You breathe into your inner thighs and hips, allowing them to release.
Staff Pose (Dandasana)
You sit with your legs extended straight out in front of you. Your feet are flexed, toes pointing towards the sky. Your hands rest beside your hips, palms down. You press your sit bones into the mat, lengthening your spine and drawing your shoulders back and down. This pose cultivates good posture and strengthens your core.
Seated Twists
From a comfortable seated position, you inhale, lengthening your spine. As you exhale, you gently twist your torso to one side, placing one hand behind you for support and the other on your opposite knee. You use your breath to deepen the twist, looking over your shoulder. You return to center on an inhale and repeat on the other side. These twists help to improve spinal mobility and digestion.
Gentle Forward Folds
From a seated position with legs extended (Staff Pose), you inhale, lengthening your spine. As you exhale, you hinge forward from your hips, reaching for your shins, ankles, or feet. You keep your back straight, avoiding rounding your spine. You aim for a stretch in your hamstrings, not pain. You allow gravity to assist you, breathing into any areas of tension. You can also do this from a cross-legged position.
Support and Comfort: Using Props
Yoga is for every body, and props make floor poses safer and more comfortable for everyone. You should not hesitate to use them. They extend your reach, support your joints, and allow you to relax deeper into positions.
Bolsters and Cushions
You can place a bolster or cushion under your hips in seated poses to tilt your pelvis forward, making it easier to maintain a straight spine. In forward folds, a bolster can support your torso, allowing for a more restorative stretch. For supine poses, a bolster under your knees can relieve lower back pressure.
Rolled Blankets
A rolled blanket can provide gentle support under your neck in Savasana or other reclined poses. You can also place one under your knees in Child’s Pose if your knees feel sensitive. A blanket under your sit bones in seated postures helps to create stability.
Alignment Principles for Floor Poses
You develop a deeper connection to your body by understanding proper alignment. In floor poses, certain principles repeat themselves.
Spine Neutrality
In many floor poses, the aim is to maintain a neutral spine. This means avoiding excessive arching or rounding. For example, in Cat-Cow, you actively move through these extremes, but in positions like Staff Pose or even Plank, you aim for a long, straight spine. You engage your core muscles to support your spine.
Relaxed Neck and Shoulders
Tension often accumulates in your neck and shoulders. You consciously release this tension in floor poses. In Downward Dog, let your head hang freely. In Child’s Pose, allow your shoulders to relax away from your ears. You breathe into these areas, inviting release.
Even Weight Distribution
In kneeling and prone postures, you distribute your weight evenly. In a tabletop position (hands and knees), your weight should feel balanced across your hands and knees. In Plank, you press actively through your hands and the balls of your feet, without dumping weight into your wrists or shoulders.
Recovery and Closing Your Practice
You bring your practice to a gentle conclusion with poses that restore and integrate your body’s experience. These postures help you transition from movement to stillness, preparing you for relaxation.
Supine Twist (Supta Matsyendrasana)
You repeat the Supine Twist as a closing pose. You lie on your back, hugging your knees to your chest. You extend one arm out, letting your knees fall to the opposite side. You breathe deeply, allowing your spine to release any remaining tension. This twist helps to neutralize your spine after movement.
Fish Pose (Matsyasana)
You lie on your back. You lift your chest, arching your upper back, and rest the crown of your head gently on the mat. You can slide your hands, palms down, under your hips for support. Your forearms and elbows press into the mat. This gentle backbend opens your chest and throat, counteracting any forward folding and promoting deeper breathing.
Savasana (Corpse Pose)
You conclude your practice with Savasana. You lie flat on your back, letting your arms rest beside your body, palms facing up. Your legs extend, feet falling naturally open. You close your eyes gently. You allow your body to completely relax into the floor. You remain here for several minutes, allowing your body to absorb the benefits of your practice. You release any thoughts or distractions, simply resting in stillness.
You have now completed a floor yoga sequence. You have moved your body with intention, breathed deeply, and found moments of quiet. Your body feels more open, your mind calmer. You should feel a sense of accomplishment and peace.
FAQs
What are floor yoga poses?
Floor yoga poses are yoga postures that are performed while seated, lying down, or supported by props on the floor. These poses are accessible to people of all fitness levels and can be a great starting point for beginners.
What are the benefits of floor yoga poses for absolute beginners?
Floor yoga poses can help beginners build strength, flexibility, and body awareness. They can also help to reduce stress, improve posture, and increase relaxation. Additionally, floor yoga poses can be a gentle introduction to the practice of yoga for those who may have physical limitations or injuries.
What are some examples of floor yoga poses for absolute beginners?
Some examples of floor yoga poses for absolute beginners include Child’s Pose (Balasana), Cat-Cow Stretch (Marjaryasana-Bitilasana), Seated Forward Bend (Paschimottanasana), and Supine Spinal Twist (Supta Matsyendrasana). These poses are gentle and can be modified to accommodate different levels of flexibility and mobility.
How can beginners prepare for practicing floor yoga poses?
Before practicing floor yoga poses, beginners should find a quiet and comfortable space to practice. It’s also important to use a yoga mat or a soft surface to provide cushioning and support. Additionally, wearing comfortable clothing that allows for ease of movement is recommended.
Are there any precautions beginners should take when practicing floor yoga poses?
Beginners should listen to their bodies and avoid pushing themselves too hard in any pose. It’s important to communicate with the instructor about any physical limitations or injuries before starting a yoga practice. Additionally, beginners should focus on proper alignment and breathing techniques to prevent strain or injury.


